Switching Your Objective Lens

Tug O WarThinking about a beloved book you have read aloud to your class for years brings many memories of joy and accomplishment. These are memories that are rekindled every time you take out the book a year later or when a former students stops in to say hello and reminds you how much you meant to them. But there comes a time when you say, I have read this book for 27 years and I think I want to try something new. This year, I have accepted a position as an Instructional Technology Integrator. I have the pleasure of supporting teachers in designing learning experiences for primary learners. The third grade team approached me about redesigning their Mr. Popper’s Penguins read.

We began with the end in mind, talking about the learning objectives. The love of a good story was one that came up fairly quickly. As we continued the conversation, I began asking questions trying to uncover the complexities of the text, such as “what makes this a book you continue to read year after year?” and “are there any conflicts in the book that draw the reader in?” These questions helped guide the conversation in new directions. We were landed on the struggle of Mr. Popper keeping his penguins and the financial burdens involved in keeping exotic animals as pets. The more we talked about it, the more the conversation zoomed in to the key plot points of the text. For me, when designing learning experiences for readers, I try to find a way for them to think about a cultural dilemma through which they read the text.  I then suggested using the Tug O War thinking routine to frame their class read. This routine helps readers think about the “tugs” they experience when reading a text that pulls them one way or another of a fairness dilemma. In this case, the question was how was Mr. Popper going to be able to afford his penguins? The lens through which we were looking at the text was zoomed in too close. We needed to zoom out and think about the bigger dilemma.

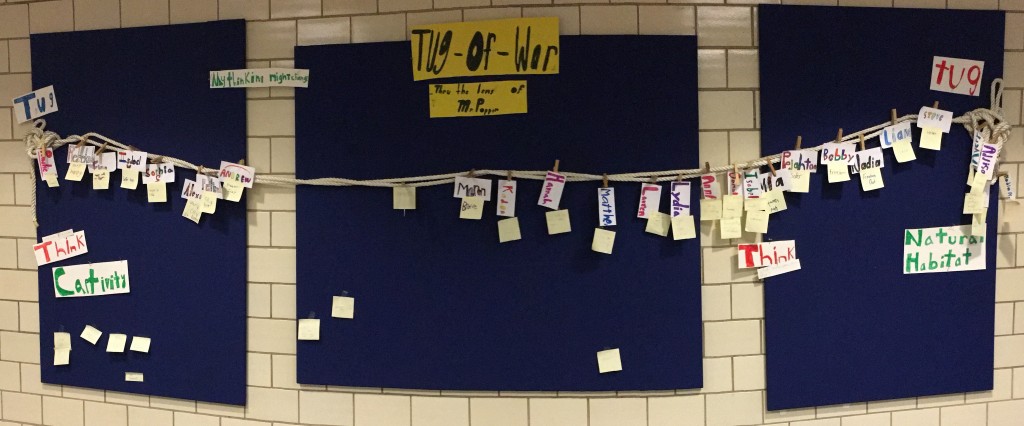
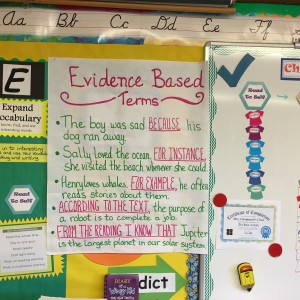
Through further discussion, we realized that the fairness dilemma was bigger than the words in the text. The dilemma is, are animals better kept in captivity or living in their natural habitats? This moment defined the lens through which we would look through this year’s reading of Mr. Popper’s Penguins. The 3rd grade team set up a Tug O War board in the hallway between their classrooms where the reader’s thinking can become visible throughout their reading. Through a conversation before beginning the book, the readers chose their stance and clipped their name to the rope one either side of the dilemma. Today, they are into the first couple of chapters in the book and some readers have already changed their minds about their stance. They move their names along the continuum between captivity and natural habitat depending on the “tugs” in the text. They are pulling specific examples of what made them change their thinking directly from the book. I borrowed this Evidence Based Terms from a fifth grade teachers room to help support the third grade readers support their thinking moves.

IMG_1654

This will help not only help the ways in which they support their thinking, but will also inform their writing in their blogs. Today will be their first entry in their Third Grade Exploring Ideas blog. If you have a moment, I’m sure they will enjoy reading and responding to your comments.

My science colleague got new LCD microscopes for her classroom this week which made me think about the ways our thinking changes when we zoom in and out of ideas. Switching our objective lens enables us to designing learning experiences that support thinking strategies. I continue to think about how to best create a learning culture where thinking is valued, visible, and actively promoted as part of the regular, day-to-day experience of all students.

Seeds of Culture – Overview Part 1

CultureCultureI have pushed myself this year to truly integrate the International Baccalaureate (IB) Units of Inquiry while focusing on individual musicians. In this set of posts, I plan to reflect upon the journey of the fifth grade musicians as well as my own. I would also like to challenge you to think more about the nature of the experience and less on the content area. I am framing this in the context of music, but how might this project look in social studies, science, language arts, or art?

The idea of this project came about after a long conversation with my friend and choir colleague Eve Pierre. Eve is an amazing musician, educator, facilitator, consultant, and friend. She has been my mentor and springboard regarding all things IB and Standards Based Grading.

The unit we are currently exploring is Where we are in place and time: An inquiry into orientation in place and time; personal histories; homes and journeys; the discoveries, explorations and migrations of humankind; the relationships between and the interconnectedness of individuals and civilizations, from local and global perspectives.

exploration

We began inquiring about the migration of music and what impact that may have on people in the past, present, and future. This kindled a conversation about aural traditions,  how music has been past down from generation to generation, and cultural contexts of music in different cultures. Through talking to the musicians about music, culture, migration, and bouncing ideas off of Eve, Seeds of Culture began.

Project Overview (Part 1):

  • Musicians choose a song that connects them to their culture (Part 2)
  • Create a short digital presentation of the music’s affects from the past, present, and future
  • Teach the class a portion of your song
  • Create a Seed Rhythm on a looper e.g. Looseque or DM1 (Part 3)
  • Find other musicians that share the same or similar Seed Rhythm
  • Compose and perform the original pieces at an Exhibition style concert (Part 4)

I will write posts as the musicians share each part of their projects. So far, this has been an incredible way to get to know individual learner’s personal histories, cultures and journeys. I am learning so much about their music, but most of all, strengthening relationships.

What’s On Your iPad? – Creating Music

There are so many music apps out there for iDevices making it may be hard to decide which ones are best. Once you find apps that you may think would work for you and the musicians in your classroom, it is important to decide if it will create opportunities for musicians to do new things in new ways. I would recommend that you download the chosen app yourself and play with it. Create something. The musicians that visit your room will have no issues navigating an app themselves, but I find it useful to know the app well enough to be able to authentically create a musical experience that is relevant to the musicians and to scaffold a musician if needed.

We are not teaching the apps. We are creating experiences for musicians to listen, perform and create music supported by technology. I have had a set of iPads in my classroom for the past 2 years and have gathered some apps that support the ways we experience music. These may or may not work for you and your students. Many have multiple entry points to support musicians with differentiated prior experiences. Some cost more than others, but well worth the cost.

1. GarageBand

mzl.qnlhrbvgFrom the multi-touch instruments to smart instruments, this is a powerhouse music creation app. GarageBand has multiple points of entry to create opportunities for musicians with different experience levels to perform and create together.  The new update supports up to 32 tracks of recorded sound and hosts many internal loops. Starting a Jam Session allows you to play or record live over Wi-Fi or Bluetooth with up to three other musicians. The musician who initiates the Jam Session collects everyone’s recordings so they can be mixed as a song and be shared later.  This is an app that is used by all of the musicians in my classes for many of the projects they create.

2. MadPad HD

e6463151bd2556854fbbc5e410790ac0e70f5df8

Remix your life with MadPad! Turn everyday sounds into an instrument. You can create custom soundboards with the sounds from your surrounding environment and remix them into a musical creation. Record loops and add layers live while recording the piece to share later. You can also share your soundboards on Twitter and FaceBook. This app is great when discovering organized sound, simultaneity, and texture. I also scaffold this app with VidRhythm.

3. iKaossilator

mzl.olokqoatKorg has created an incredible interface using an intuitive X-Y pad to provide expressive musical control. The Pad loads entire scenes and gives control to single tracks of many different electronic genres. From Electro House to Dubstep, musicians manipulate melody, harmony, rhythm, texture, and mix by stroking, tapping, or rubbing the screen with their finger. The built-in loop sequencer lets you layer up to five musical parts on one scene. You can record your performance in real time, or export a completed loop as an audio file and share directly to SoundCloud. My colleague who teaches middle school choir wanted to recreate a dubstep remix of a piece they were performing. The singers asked me if there was an app to add wobble bass to their piece. This was it.

4. Traktor DJ

Traktor-DJ-Logo-on-Mevvy.com_This is a Pro DJ app. Create remixes and mashups quite easily with Traktor DJ with direct access to your iTunes library. The 2 deck interface continues the familiar swipe and pinch gestures. This app gives you complete control of your music beginning with automatic tempo and key matching, a crossfader, 3-band EQ, and filter on each channel. There are built in DJ effects including reverb, delay, and dramatic glitch effects like BeatMasher. My secondary general music class used Traktor DJ for their final project. They put together an Electronic Music Event. Each musician contributed a 5 min. live set mixing music of their choice. It was an incredible evening.

5. ThumbJam 

mzl.pxjrbvhp

When performing, this app is awesome for soloing. ThumbJam enables expressive performances by making use of tilt and shake to add vibrato, tremolo, note bends, and volume swells for more realistic results. There are many instruments to choose from and the sounds are very nice. ThumbJam broadcasts tempo, key, and scale to other nearby devices via Bluetooth so many musicians can be in sync live.

As I finish this post, I think I need to create a series of posts for different areas of experiencing music. I will write posts for listening and performing as well. Stay tuned.


Musician’s Statements

Fifth grade learners are beginning to plan their Primary Years Program (PYP) Exhibition. The overarching theme is “How are you positively effecting your community?” I have been thinking about how I can connect the musical experiences we are having in my room to other ways of knowing.

Chalk Talk

Outside music room at West Hills Middle School, Michigan

Outside music room at West Hills Middle School, Michigan

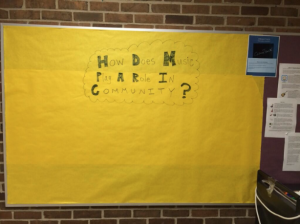
Chalk Talk is a Visible Thinking Routine developed by Ron Ritchhart. This particular routine is designed as a written conversation used to uncover prior knowledge and questions. It is an open-ended discussion on paper. This routine ensures all voices are heard and allows individual thinking time. Originally designed as a silent written conversation, I have altered the use for our unique situation. I posted the question “How does music play a role in community?”  outside of my classroom on a large bulletin board. The chalk talk is open to everyone in the school and is attracting students that are not in my classes. We are discussing the effects of music on culture in class and using the chalk talk as a springboard into these conversations.

Musician’s Statements and Technology

Thank you Tricia Fuglestad (@fuglefun)

Thank you Tricia Fuglestad (@fuglefun)

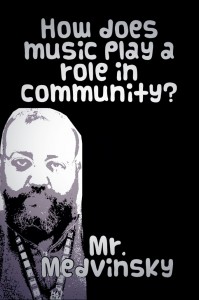
Each musician is going to make a Musician’s Statement, then create and share them using the apps CamWow and Pic Collage. These two apps are free and work in tandem to create the image above. Musicians will make these next week

CamWow

CamWow

Step 1: Open CamWow and select the effect you would like to use. I chose the fuzzy b&w to keep the focus on the statement and name of the musician.

Step 2: Take the picture and share the picture to Photo Album.

Taken with CamWow

Taken with CamWow

Step 3: Open PicCollage and Tap to create a new collage

PicCollage

PicCollage

Step 4: Add your photo from Camera Roll and double-tap to edit

Step 5: Choose Clip Photo and draw around your face with your finger and click Done. This step will allow you to clip out the CamWow watermark.

Step 6: Drag your clipped background to the garbage can in the upper right hand corner.

Step 7: Pinch the clipped picture to size and rotate. Be sure to leave room for the statement text and musician’s name.

Step 8: Tap the Layout button on the lower left of the screen and Change Background. I set the background to black to keep the focus on the statement and musician’s name.

Step 9: Tap the Plus button on the bottom of the screen to add text. Type the musician’s statement and name in separate text boxes to ensure separate movement and sizing. I put my statement on top and name on the bottom, but I would suggest to stage the test where it fits best with the picture. In the app, the capital “T” allows you to change the font, the pen changes the text color, the paint bucket changes the background color of the font, and the three dots adjusts the justification and text outline.

Step 10: Tap the share button on the lower right of the screen. I do not post to PicCollage. Save your PicCollage to Library.

Step 11: To collect the images, I have created a DropBox folder. Open DropBox, select your folder, and tap the three dots on the upper right corner of the screen. Choose your image and Upload.

I saw my friend Brandy Carlson, elementary art teacher in Walled Lake, Michigan, today and talked through this statement project. We made her image in 5 min. on the couch.

Brandy Carlson (@carlson_brandy) check her out at http://www.artsonia.com/schools/school.asp?id=59936

Brandy Carlson (@carlson_brandy) check her out at http://www.artsonia.com/schools/school.asp?id=59936

We are creating cover songs, green screen videos, and musician’s statements to prepare for Exhibition. On April 30th, the 5th grade learners will present their PYP projects and I can’t wait to see what they will contribute to their community.


Green Screen in the Music Room

photo01

I have been reading about teachers using green screens in their classrooms to create videos with creative backgrounds. Especially Tricia Fugelstad (@fuglefun), a K-5 art teacher from Chicago, who has a wonderful blog. Between reading tweets and blog posts, I decided to purchase a green screen, iPad tripod, and Green Screen app by DoInk. Luckily, I have a friend who is a professional photographer and is digging through his basement for a set of tungsten lights. Green screens can be used for many different videos, 4th grade musicians are sharing their listening maps with videos.

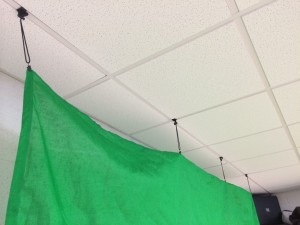
Step 1: First things first. Hang your green screen. There are many ways to do this, best probably being on a truss, but I just hung mine from my rooms drop ceiling. The screen is thin and light enough that the bungee and clip system worked out fine.

photo203

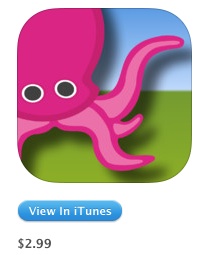
Step 2: Download Green Screen by Do Ink – This app allows you to make incredible green screen videos right on your iPad. It is easy to use and creates great results. With this app, learners can share stories, explain their ideas, and express themselves in many different ways.

537873

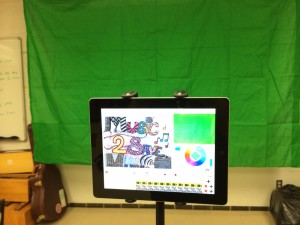
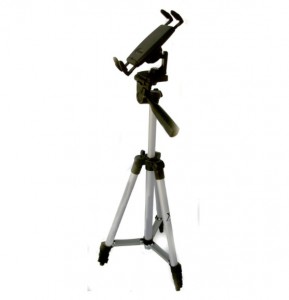
Step 3: Mount your iPad on a tripod. I purchased a fairly inexpensive tripod and iPad clip. I recommend a stable device to hold your iPad steady, it will make a better video. You can also put your device on a desk or table, but I find the tripod to be easier to maneuver and customize the height and angle.

Screen Shot

Step 4: Create the experience for learners, give time for conceptualizing and designing, and record your video. In 4th grade we are considering texture changes and graphic scores through Listening Maps. Musicians completed their own incomplete listening maps. We are ready to present our maps to one another and had a plan to use Three Ring to record our explanations and share with others. With the addition of the green screen, we have changed our way of showing understanding in the music room.

Two 4th grade musicians shared their maps and recorded their green screen videos today in class. I will use their videos as models to other 4th grade musicians as they consider their own. Today was our first day with a green screen and I think the musicians did great.


Playing in the Digital Sandbox

This year I started a MakerSpace in my middle schools and I have had lost of fun sharing the sandbox with the makers. We meet on Fridays after school for an hour and a half. Even after the first meeting, we all agreed that was not enough time. Makers are constantly making parents wait and breaking their creative flow because we have run out of time. We have met about 10 time now and the group keeps growing. I answer an email a week from parents asking about Makerspace and if it is too late to join. Our numbers are growing.

What is Makerspace?

This is a group of makers, inventors, tinkers and innovators who enjoy experimenting with how the world works. We will design, create, build, rebuild, experiment, and share digitally about the process of creating unique inventions. We will be experimenting with cutting edge technology such as the Makey Makey Arduino board, Raspberry Pi, the Drawdio (piano) circuit and many conductive materials We will learn to code with iPad apps such as Hopscotch and Kodable and also learn MIT’s Scratch. Come invent with us!

Maker Mindset

We started the year off with a global cardboard challenge inspired by Imagination Foundation and Caine’s Arcade. It is important that  the learners understand that being a maker goes beyond electronics and blinky lights. It is a mindset. Gary Stager (@garystager) and Sylvia LibowMartinez (@smartinez) wrote Invent to Learn, an incredible book about the maker movement and design thinking. The design cycle is how the makers approach their projects and designs.

IMG_0062

This cycle was apparent when the makers began their cardboard challenge. They designed, built, played, redesigned, played and rebuilt. There were even makers that brought tape and cardboard to our Arcade Night to redesign their games in between people playing them. Parents, friends and administrators came to their Arcade Night and played their games. The makers were quite proud of their inventions.

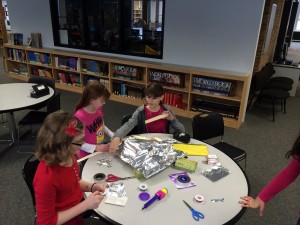
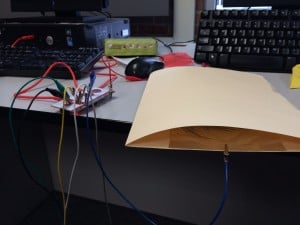
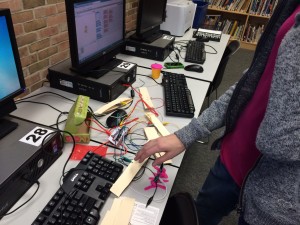
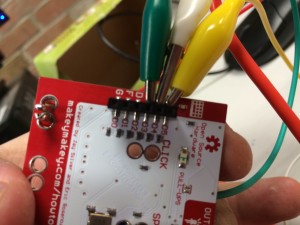
We have recently started MaKey MaKey projects. Makers are experimenting with conductive materials, peripherals, and Scratch coding language. I have 10 MaKey MaKey boards, alligator clips, play-doh, tin foil, pencils, paperclips, conductive tape, conductive paint, wire, and folders. The makers have these things to use in any way they need. I also find the materials they need that I may not have.

IMG_0003

So far, the makers have conceived:

Simon - pitch matching game.

Simon – pitch matching game.

Simon pitch matching game – When you step on the pedal (folder and tin foil) Scratch plays the melody the makers coded. There are other color coded buttons that play single pitches that the player must play in the correct order.


Minecraft Controller

Minecraft Controller

This maker wants to customize his interface with Minecraft. He thought about his most used commands and is designing a temporary build to test his invention with the plans to create a more permanent controller in shop class.

Piano Stairs

Piano Stairs

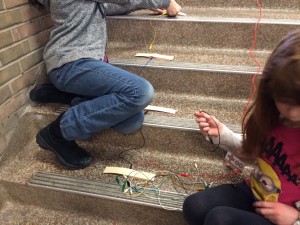
There have been many iterations of piano stairs. These makers approached the principal about installing a piano staircase going down to their gym. They began their experimentation last week. They worked a bit with the makers of the Simon game to design the stair interface. They needed more than one pedal, so they cut up a folder to make a thin strips for each pedal.

Piano Stairs

Piano Stairs

Makers come up with interesting ways to use alligator clips to wire the MaKey MaKeys. These run to each stair to trigger a note on their piano.

Piano Stairs

Piano Stairs

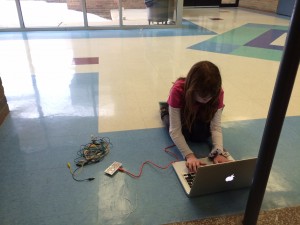
Off to the stairs to start wiring. These makers went around to other groups to commandeer as many alligator clips as they could. Since then, they have decided to make their own leads with spools of wire. Hannah is logging into her Scratch account on my laptop to launch her piano stairs code.

Piano Stairs

Piano Stairs

By the time they began wiring the stairs, Makerspace was over. All of the others had gone home. These two young ladies asked if I would stay and called home to extend their time with the design cycle. We will continue the process next Friday.

I leave you with a performance of the UofM fight song. The interface is a play-doh piano designed, coded and performed by a fifth grade maker.


Voice and Choice in Music Education

Image from www.freegreatpictures.com

Image from www.freegreatpictures.com

Technology integration is most effective when it provides a transparent scaffold within a musical learning experience. The technology provides a differentiated experience from learner to learner, where music learners can have their voice and choice in deciding which technology best suits their needs and how they choose to use technology to support their musicianship. However, it is important not to concentrate too much on the technology itself. The music must remain the focus of the learners’ experience, with the technology becoming a vehicle for learners’ musicianship. Technology simply provides musicians multiple pathways to express, problem solve and show understanding of learning goals, thus fostering divergent thinking.

I have experienced a shift in the culture of my classroom. I find that learner/musicians engage deeply in experiences that connect to the music that is the soundtrack of their lives. It is relevant, current, and forward-thinking; they see themselves as innovators and creators of new music. It is a new mindset, and technology is at the forefront of this seismic shift.

Digital musicians must find a distinctive musical “voice.” They may build on what has gone before, so they may sidestep existing work. Either way, they become a new kind of musician: one who originates and performs, who creates and produces, and who harnesses the potential of technology in new and exciting ways. (Hugill, 2012)

When music learners are given these choices, they begin to take more ownership of their learning and construct their own understanding within an inquiry-based learning environment. Creating opportunities for musicians to show their understanding of musical concepts in their own way nurtures an environment where they feel valued and honored. This model also fosters divergence in the ways different musicians interpret and create music. While some may choose technology, some may prefer creating music with acoustic instruments, and still others may opt for a cappella. The important idea is that all are acceptable. We, as educators, just need to ensure that all are available. Making music on acoustic instruments has been accepted as a way of being a musician for a long time; it is making music through technology that we must now also consider valid.

While it is tempting to just dabble with technology in the musical classroom, it cannot be simply an extra “add-on.” Learning to use technology as a musician should be one of the core processes in the classroom. Technology should be ubiquitous, transparent, and ever-changing; it must constantly evolve along with learning. Educators should not simply plan “Technology Tuesdays” or tell students, “When you are finished with your work, you may play a game on the iPad.” Because learners are not inherently born with an understanding of how to use technology, they need to engage in experiences that foster their understanding of its appropriate uses. If the only way learners use technology in a classroom is to play games after they are finished with a lesson, they will come away believing that is all music technology can be. Instead, technology must support music learners’ engagement in new musical experiences in new ways.